If you’re recording a podcast—whether at home or in a professional podcast studio in Saigon—one thing matters more than most: your mic placement.
In this blog, I’ll share simple mic placement tips that I’ve learned after recording hundreds of episodes and working with many podcasters. These mic placement tips will help you sound more professional in every episode.
Table of Contents
Why Mic Placement Matters
Camera settings help you look good on the video, but remember, with podcasting, audio quality is even more important. When you place your mic the right way, your voice sounds clear, full, and pleasant. Listeners will stay with you longer. Your message gets across better.
When mic placement is wrong, your podcast can sound:
- Echoey
- Distant
- Full of harsh “P” or “B” sounds (called plosives)
- Boomy or distorted
This happens more often than you think—even in good podcast studios.
At my Saigon podcast studio, I often help podcasters fix their sound just by adjusting the microphone. Small changes can make a big difference.
1. Keep Your Mic 2-3 Inches from Your Mouth – like 2-3 inches
The best distance between your mic and your mouth is about 2 to 4 inches. That’s about the size of your fist or the “shaka” hand sign.
Why this matters:
- Too close: your voice will sound boomy, and it might distort.
- Too far: you’ll pick up echo and background noise.
Here’s a quick tip I give my clients at the studio:
Sit comfortably, keep your back straight, and make sure your mouth is always about a fist away from the mic.
If you move while talking (which is natural), try not to lean too far back or forward.
2. Speak Slightly Off-Axis to Reduce Plosives
Plosives are those sharp “P” and “B” sounds that hit the mic like a mini gust of wind. They cause unpleasant pops in the audio.
To reduce this, try speaking slightly off-axis.
What does that mean?
- Instead of speaking directly into the mic,
- Speak at a slight angle—just a little to the left or right, or slightly above or below.
This simple trick helps the air from your mouth miss the mic’s center, which means fewer harsh sounds.
This works especially well if you’re using a dynamic microphone, which is common in most podcast studios—including mine in Saigon.
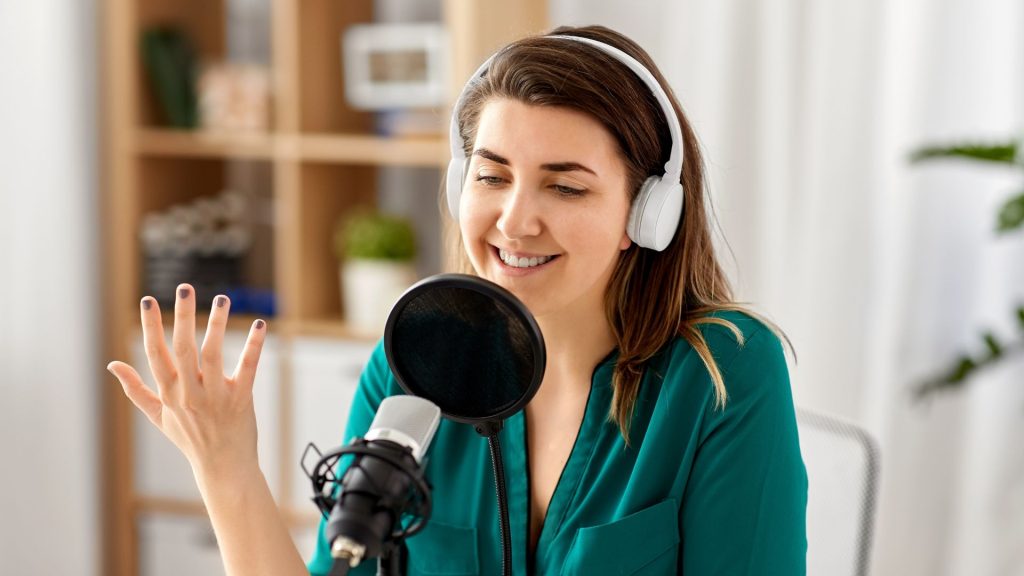
3. Use a Pop Filter or Windscreen
If you don’t already have one, get a pop filter. It’s a cheap and easy way to improve your sound.
What’s the difference between a pop filter and a windscreen?
- Pop filter: a thin mesh screen placed in front of the mic
- Windscreen: a foam cover that goes over the mic
Both help reduce plosives and mouth noise. At our podcast studio for hire in Ho Chi Minh City, every mic is already equipped with one—so you don’t have to bring your own.
They also keep the mic cleaner (bonus!).
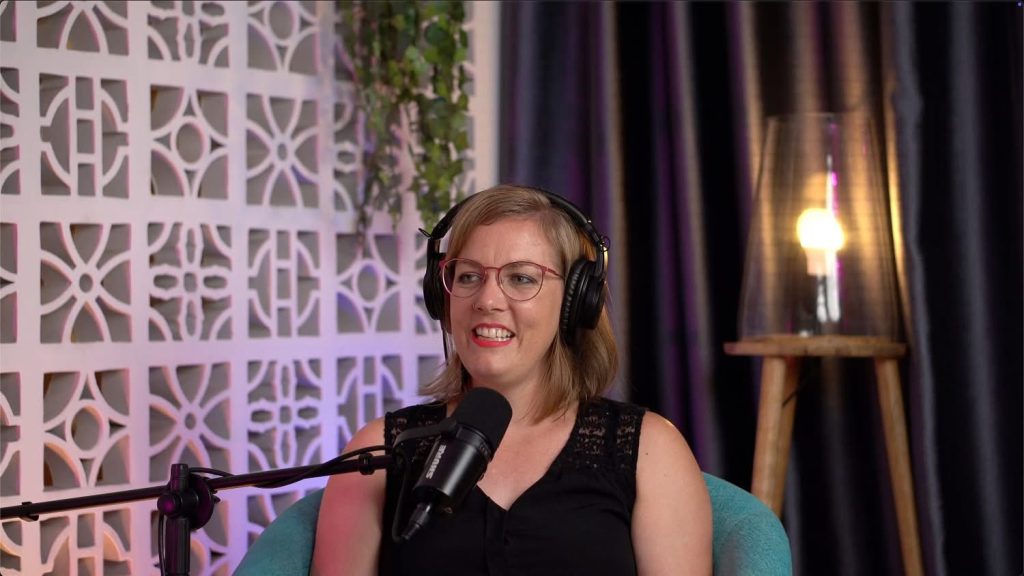
4. Check the Mic Angle
Mic placement isn’t just about distance—it’s also about angle.
Your mic should be:
- Slightly below your mouth and angled up
- Or slightly to the side and angled toward your mouth
This avoids picking up too much breath or saliva sounds.
Also, place the mic so it’s not pointing toward a noise source like a fan, aircon, or window.
5. Use a Boom Arm or Adjustable Stand
If your mic is sitting on your desk, it can pick up vibrations when you move or type.
Instead, use:
- A boom arm that attaches to your table
- Or an adjustable stand that keeps the mic steady
This helps reduce handling noise, keeps your hands free, and allows you to place the mic at the perfect height and distance.
In my Saigon podcast room, every mic is mounted on a boom arm to make setup easy and consistent for each guest or host.
6. Watch the Room You’re Recording In
Mic placement also depends on your room.
A bad-sounding room can ruin good mic technique. Here’s what to avoid:
- Hard surfaces like empty walls, glass, or tile
- Echo from large open spaces
- Background noise from windows, AC, or street traffic
Here’s what to try:
- Add soft materials like curtains, rugs, or blankets
- Record in a smaller room with less echo
- Choose a professional podcast studio in Saigon with acoustic treatment (like ours 😉)
7. Always Do a Sound Check
Before you hit record, always do a quick sound check.
Here’s a simple checklist:
- Is the mic at the right distance (6–8 inches)?
- Are you slightly off-axis?
- Is the pop filter in place?
- Can you hear any background noise?
- Is your voice clear and not too loud?
If you’re not sure, record a short test clip and listen back using good headphones.
This is something I do with every client before they start recording in our Saigon podcast studio for rent—because once you record a full episode, it’s hard to fix bad sound later.
8. Sit Still and Control Your Movements
Even with perfect mic placement, if you move too much while recording, your voice can become inconsistent.
Why this matters:
- Leaning back or turning your head can make your voice sound distant.
- Tapping the desk or fidgeting can cause unwanted noise.
- Moving away from the mic can change your sound quality mid-sentence.
How to fix it:
- Sit comfortably in one position.
- Keep your mouth the same distance from the mic as you speak.
- If you need to move, use a swivel chair or a boom arm so the mic moves with you.
This is one reason why I always recommend using a boom arm and headphones, especially at our podcast studio in Saigon. It helps you hear how you sound in real-time and keeps your voice consistent throughout the recording.
9. Extra Tips for Multi-Host or Interview Podcasts
If you’re recording with more than one person:
- Don’t share one mic—it’s never a good idea.
- Give each person their own mic, placed 2-3 inches from their mouth.
- Angle the mics away from each other to reduce crosstalk (when one mic picks up both voices).
- Use headphones so you can monitor in real time.
At our studio in Ho Chi Minh City, we have multiple mic setups ready for interviews, co-hosts, and guests—no need to bring anything.
Final Thoughts: Mic Placement = Better Audio
You don’t need to be a sound engineer to get better podcast audio. You just need to:
- Keep your mic at the right distance
- Angle it properly
- Use a pop filter
- Choose a good recording space
It might take a little practice, but once you get it right, your podcast will sound so much more professional.
If you’re still struggling with your audio quality, whether it is because of your technical setup or your equipment, you can choose to outsource podcast editing. Don’t hesitate to contact me at Seven Million Bikes Podcast for more podcasting services.
Vietnamese Version
Cách Đặt Mic Khi Quay Podcast – Bí Quyết Để Có Âm Thanh Chuyên Nghiệp
Nếu bạn đang quay video podcast ở Sài Gòn – dù là tại nhà hay trong podcast studio ở Sài Gòn – có một yếu tố quan trọng ảnh hưởng trực tiếp đến chất lượng âm thanh: vị trí đặt micro (mic placement).
Sau khi đã ghi hàng trăm tập podcast và hỗ trợ nhiều podcaster khác nhau tại Seven Million Bikes Podcast Studio, tôi nhận ra rằng: chỉ cần điều chỉnh vị trí mic đúng cách, chất lượng âm thanh có thể thay đổi hoàn toàn – trở nên trong, rõ và chuyên nghiệp hơn hẳn.
Trong bài viết này, tôi sẽ chia sẻ những mẹo đặt mic đơn giản mà bất kỳ ai cũng có thể áp dụng, giúp bạn quay podcast chuyên nghiệp hơn, dù bạn đang tự quay tại nhà hay thuê studio podcast ở HCM.
1. Giữ Khoảng Cách 2–3 Inch Từ Miệng Đến Mic
Khoảng cách lý tưởng giữa miệng và micro là 2 đến 3 inch (tầm bằng nắm tay hoặc dấu “shaka 🤙”).
- Nếu bạn để quá gần, âm thanh sẽ bị ù, méo hoặc vỡ tiếng.
- Nếu quá xa, bạn sẽ nghe thấy tiếng vọng và tạp âm trong phòng.
Tại studio của tôi ở Sài Gòn, tôi luôn hướng dẫn khách ngồi thẳng lưng, giữ mic cách miệng một nắm tay và cố gắng không di chuyển quá nhiều khi nói. Việc duy trì khoảng cách ổn định giúp âm thanh đều và rõ hơn rất nhiều.
2. Nói Chếch Một Góc Nhẹ – Giảm Tiếng “Bụp” Khi Phát Âm P, B
Những tiếng “bụp” hoặc “phì” (gọi là plosives) xảy ra khi bạn nói trực tiếp vào mic. Để tránh điều này, hãy nói chếch nhẹ sang một bên hoặc chếch từ trên xuống.
Cách này giúp luồng hơi từ miệng không thổi thẳng vào mic, giảm đáng kể các âm “bốp” khó chịu.
Đây là một mẹo nhỏ nhưng cực kỳ hiệu quả – đặc biệt nếu bạn đang sử dụng micro dynamic, loại mic phổ biến trong hầu hết các podcast studio ở Sài Gòn.
3. Dùng Pop Filter Hoặc Mút Chụp Mic (Windscreen)
Nếu bạn chưa có pop filter, hãy đầu tư ngay một cái – chi phí thấp nhưng hiệu quả cao.
- Pop filter: tấm lưới mỏng đặt trước mic
- Windscreen: lớp mút bọc ngoài đầu mic
Cả hai đều giúp lọc tiếng gió, giảm âm bật hơi và giữ mic luôn sạch.
Tại Saigon Podcast Studio, mọi micro đều được trang bị sẵn pop filter – bạn chỉ cần tới và bắt đầu ghi.
4. Kiểm Tra Góc Đặt Mic
Đặt mic đúng góc giúp bạn tránh được tiếng thở và tiếng ồn không mong muốn.
Mic nên được đặt:
- Hơi thấp hơn miệng và hướng lên trên, hoặc
- Chếch nhẹ sang một bên, hướng vào miệng bạn.
Đừng để mic hướng thẳng vào nguồn tiếng ồn như máy lạnh, quạt hay cửa sổ.
Một góc đặt mic hợp lý giúp giọng bạn tự nhiên, trong trẻo hơn khi quay podcast chuyên nghiệp.
Dùng Boom Arm Hoặc Chân Mic Điều Chỉnh Được
Nếu bạn đặt mic trực tiếp trên bàn, nó có thể bắt tiếng rung khi bạn gõ, di chuyển tay hoặc đặt vật nặng.
Thay vào đó, hãy sử dụng:
- Boom arm (tay đỡ mic gắn bàn)
- Hoặc chân mic điều chỉnh được
Cả hai đều giúp bạn dễ dàng căn chỉnh vị trí mic chuẩn và ổn định.
Tại podcast studio ở Sài Gòn của tôi, tất cả micro đều được gắn boom arm để tạo sự thoải mái và chuyên nghiệp cho mỗi buổi ghi.
6. Kiểm Tra Không Gian Ghi Âm
Phòng ghi âm có ảnh hưởng rất lớn đến chất lượng giọng.
Hãy tránh những không gian có tường trơn, sàn gạch hoặc kính – vì chúng gây vọng tiếng.
Thay vào đó, hãy chọn nơi có rèm, thảm, hoặc vật liệu mềm giúp hấp thụ âm thanh.
Nếu bạn muốn tiết kiệm thời gian và đảm bảo chất lượng âm thanh, thuê studio podcast ở HCM với xử lý âm học chuyên nghiệp là lựa chọn tốt nhất.
7. Luôn Test Âm Thanh Trước Khi Ghi
Trước khi bấm “record”, hãy kiểm tra nhanh:
- Khoảng cách mic đúng chưa?
- Có tiếng ồn nền không?
- Pop filter đã đúng vị trí chưa?
- Âm lượng có bị quá lớn hoặc quá nhỏ không?
Tôi luôn làm bước này cùng khách hàng tại studio. Chỉ cần test 30 giây trước khi quay podcast, bạn sẽ tiết kiệm hàng giờ chỉnh sửa sau đó.
8. Giữ Tư Thế Ổn Định Khi Ghi Âm
Ngay cả khi bạn đã đặt mic đúng cách, nếu bạn nghiêng người hoặc xoay đầu khi nói, âm thanh vẫn sẽ thay đổi.
Hãy:
- Ngồi thẳng, thoải mái
- Giữ khoảng cách mic cố định
- Tránh chạm bàn hoặc fidget khi đang nói
Nếu bạn muốn di chuyển khi nói, hãy dùng ghế xoay và boom arm – mic sẽ di chuyển theo bạn, giữ âm thanh ổn định.
9. Nếu Ghi Podcast Có Nhiều Người
Nếu bạn có khách mời hoặc đồng dẫn:
- Mỗi người nên có một mic riêng
- Giữ khoảng cách và góc đặt mic tương tự
- Đặt các mic chéo góc nhẹ để giảm hiện tượng thu lẫn tiếng (crosstalk)
- Tất cả nên đeo tai nghe kiểm âm để nghe chính xác giọng mình
Tại studio podcast ở Sài Gòn của tôi, hệ thống đa mic được setup sẵn cho phỏng vấn, talkshow hoặc podcast nhóm. Bạn chỉ cần đến, ngồi xuống và bắt đầu nói.
Kết Luận: Đặt Mic Đúng Cách = Âm Thanh Chuyên Nghiệp
Bạn không cần là kỹ sư âm thanh để có giọng podcast hay – chỉ cần đặt mic đúng vị trí, dùng pop filter, giữ tư thế ổn định và chọn không gian phù hợp.
Những chi tiết nhỏ này giúp podcast của bạn nghe chuyên nghiệp, dễ chịu và hấp dẫn hơn với người nghe.
Nếu bạn vẫn gặp khó khăn khi ghi âm, hoặc muốn tập trung vào nội dung thay vì kỹ thuật, bạn có thể thuê studio podcast ở HCM tại Saigon Podcast Studio.
Chúng tôi cung cấp không gian quay podcast chuyên nghiệp với ánh sáng, âm thanh, và cài đặt camera khi quay podcast được tối ưu sẵn — bạn chỉ cần đến và bắt đầu chia sẻ câu chuyện của mình.